More Reasons Why Shooting in RAW is Good
Today we’re going to talk about one of the best adjustments that you can do in RAW. Because a RAW file has so much more data than a JPEG it unlocks the ability to adjust highlights and shadows in way that otherwise would not be possible. Because your camera does not have the ability to display a wide range of bright and dark on the level that the human eye sees it, sometimes making these adjustments during editing is necessary. We will also briefly touch on making adjustments to the brightness/darkness of your whites and blacks.
The Details
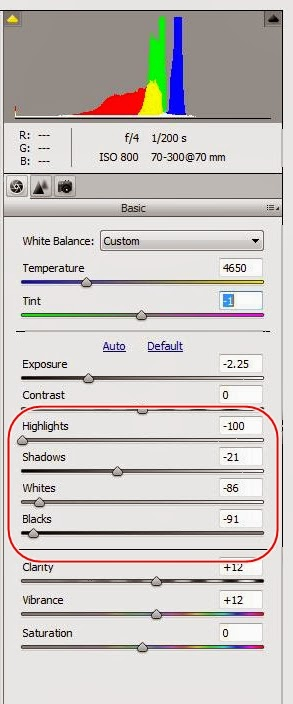
If you are working in Photoshop Elements, like me, then here is a picture of the settings that we are discussing (circled in red). Other programs will have similar settings.
When to Use
Last week we discussed what to do if your entire photo is over/under exposed. What happens if your main subject is exposed correctly but you still have areas of the picture that are too bright/dark? This problem happens very often, which is why I say that this is one of the best adjustments you can do with RAW photos. You don’t want to adjust your exposure in this scenario because it brighten or darken everything, including the parts that are already correctly exposed. Adjusting the highlights/shadows will fine tune just those bright/dark areas while leaving your correctly exposed areas alone.
Highlights
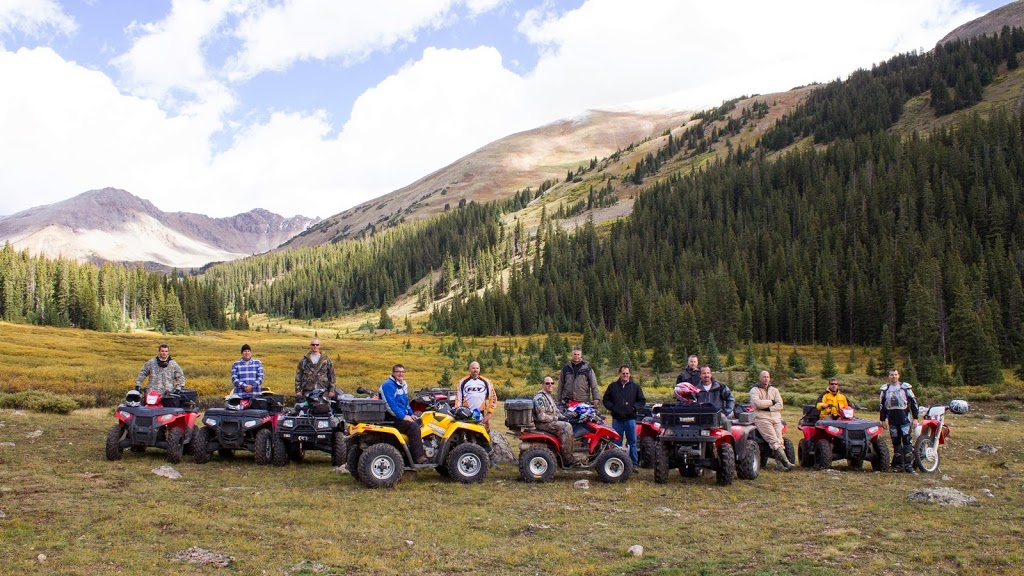
I recently went on a camping trip in the mountains of Colorado. I wanted to get a picture of my friends on their ATVs. The problem was the difference in lighting between the bright sky and my friends. If I adjusted my exposure for the subject (my friends) then the sky was too bright and looked more white than blue. If I adjusted my exposure to get a nice deep blue sky, my subject became too dark. I chose to expose for my main subject. As you can see, the sky is very bright and there is no definition in the clouds at all.
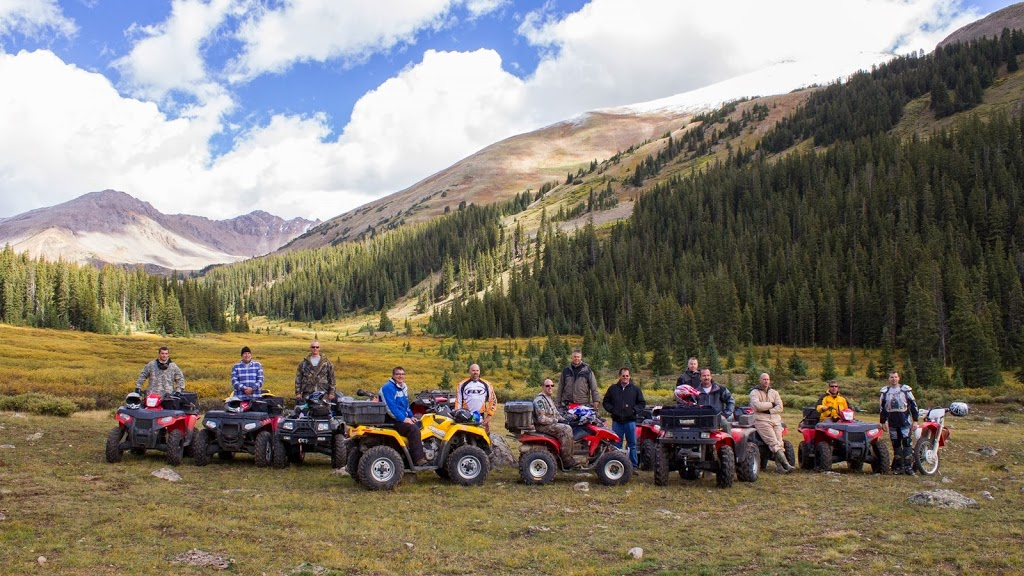
Then in Photoshop Elements, I darkened the highlights as much as possible. Below is the same photo with just the highlight adjustments. The people and mountains are practically the same in terms of lighting, but now the sky is a richer blue and you can see much more definition in the clouds.
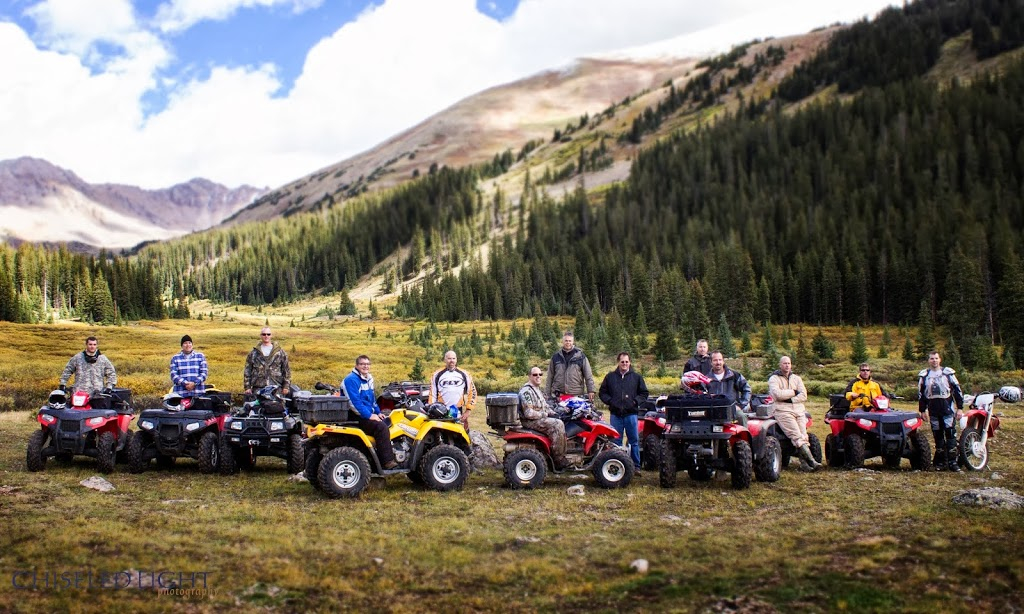
Just for fun, I’ll show you the finished product I came up with. I wanted to focus even more on my friends, so I cropped the photo a bit, added some blur, and darkened some areas. In future weeks we will discuss some of these edits. The final product is below.
Shadows and White/Black Adjustments
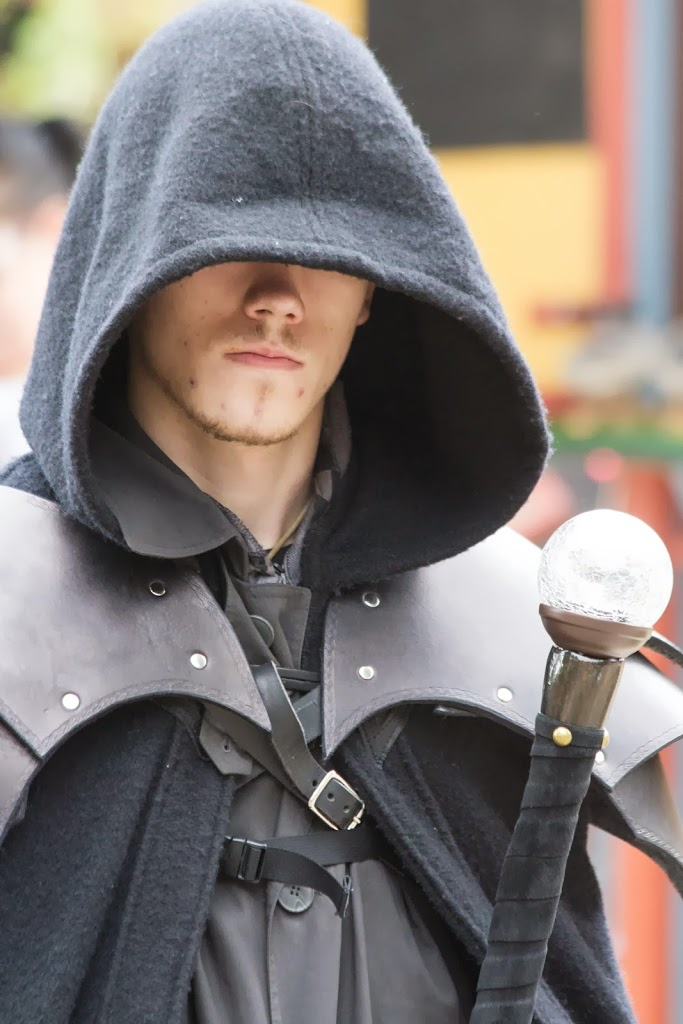
The shadows adjustment works much the same way as the highlights adjustment, just on the other end of the spectrum. Much of the time, I will see shadows in my photos that I will want to brighten just a little bit. However, in the example below, I wanted to give my subject a darker kind of a feel, so I actually darkened the shadows. This helped darken the guy’s face and under his hood. It also darkened his cloak a little, but I still was not satisfied. In your editing software, the adjustments to whites and blacks do exactly what you think they would…they make whites whiter and blacks blacker. As you can see in the before photo, this guy’s cloak is almost grey due to the bright sun, so I darkened the black adjustment. The white ball on the scepter is a little too white making it difficult to see some of the detail, so I ended up decreasing the white adjustment.
Caution
As with any edit, it is possible to go too far. Be careful not to make the photo look artificial, which can happen especially when you brighten shadows. Another problem when making your shadows too light is that you can potentially bring out noise (that grainy look) to the lightened areas.
Wrap Up
Editing in RAW allows you to most effectively adjust highlights and shadows. When you make adjustments in these areas, your editing software can pinpoint just the bright/dark areas and adjust them without drastically changing the overall exposure to your photo as a whole. The main time people use these adjustments is to darken skies that are too washed out in comparison to darker subjects.
Next Week: Clarity/Vibrance
Do you have any success or horror stories? Feel free to post your comments and questions to this post and I’ll be happy to discuss them. Happy shooting!
Bryan Rasmussen is a landscape/nature photographer at heart, although he has been known to include people in his photos from time to time. He owns Chiseled Light Photography and is also a freelance photographer for a local newspaper. Check out more of his work at chiseledlight.com and follow him at facebook.com/ChiseledLight. He is also on Instagram, Flickr, and Fine Art America.